Showing posts with label experiments. Show all posts

November 5, 2010

Oakohol Lab: Bacon Bourbon

I hate whiskey.

While I can chug Jameson as a part of an Irish Car Bomb all day and thoroughly enjoy a Jack Daniels’ barbecue glaze, you wouldn’t catch me ordering a Long Island Iced Tea, a whiskey sour, or bourbon on the rocks. I never acquired the taste for whiskey and still struggle to develop the palate for it.

So when I came across an article in Togue Magazine about bacon-infused bourbon, I knew I found just the ticket.

Mixologist David Lee got into more details in the article about fat washing. But it comes down to simple few steps and voila! All the tasty smoky goodness without the grease!

My first experiment I did with cheap grocery store brand bacon and Jim Beam I had on hand. I tasted the result. Yep. Still tasted like whiskey to me...gag...gag...

Wait, was that a hint of bacon I got at the end? Not willing to swig more of this, I got my friend @DavidMoyle, a bourbon guy, to be my lab rat.

He said he can definitely taste the bacon. And he thought it might’ve just improved the Jim Beam, even. Paulette at Girl + Fire did the same experiment with scotch after I’ve told her about mine and she said the same.

Now we are ready for the large scale upscale production: Maker’s Mark and apple smoked bacon for David’s birthday present.

DSC_0382

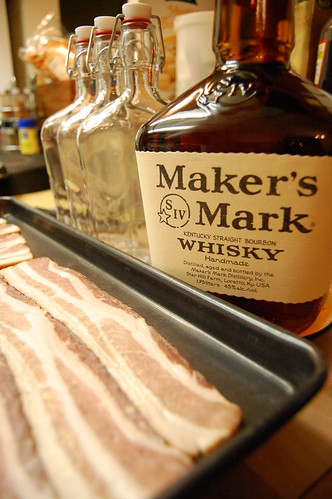
This was a large scale operation. 1 lb. of fatty apple smoked bacon (about half a cup of grease) to about 1 liter of the 1.75 liter bottle of Maker’s Mark. Awesome gift for your boozing friends especially when you can get some cool bottles from Cost Plus World Market.

I kept tasting and tasting and I thought the bacon essence was too little. Then again, I kept cringing at the taste of whiskey that I couldn't taste anything else. David and Cara (@remarx) said it was just perfect.

I brought the bottle to the bar we were meeting for David's bash. We were caught sneaking our tasting sips out of the paper bag by our waiter. However, after explaining the nature of the bourbon, instead of making David walk the bottle back to his car, the waiter asked his manager who happened to be a bourbon lover if it was okay.

He brought out classes for us to properly tasted it and that was that. We, of course, poured him, his manager AND the bartender a taster each too. LOL. They love bourbon at that bar and apparently I’ve just given them some ideas!

So now. The recipe you can’t muck up for just the regular sized 750 ml. bottle of Maker's Mark.

Bacon Bourbon

  • 4-6 slices of apple smoked bacon. The fattier the better because we want the grease.
  • One 750 ml. bottle of Maker’s Mark
  • A wide mouth glass or ceramic container e.g. a pitcher, a jar
  • Optional: paper coffee filter or cheese cloth.
First, fry your bacon: put your bacon on cold pan and cook until crispy or you can cook them in a baking sheet in the oven. Pour the hot fat into the wide mouth container. Let cool slightly. Save some of those bacon to snack on or to garnish your bacon bourbon cocktail later.

DSC_0393

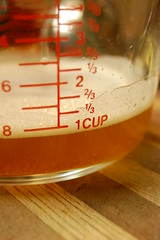
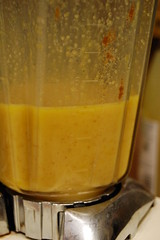
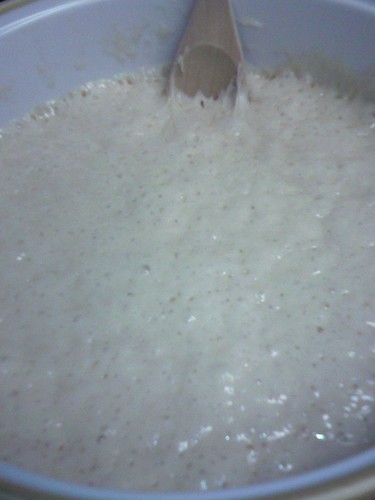
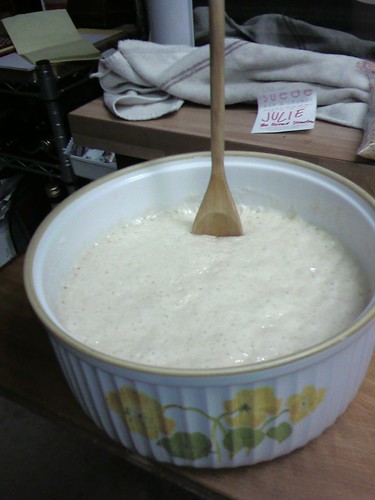
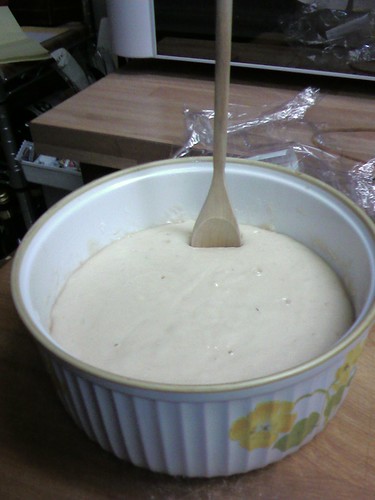
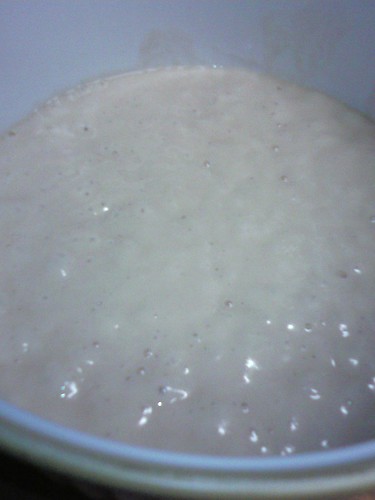
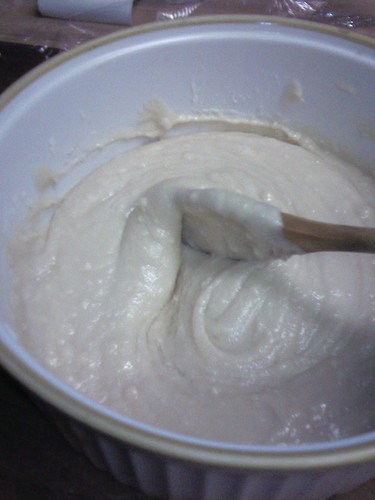
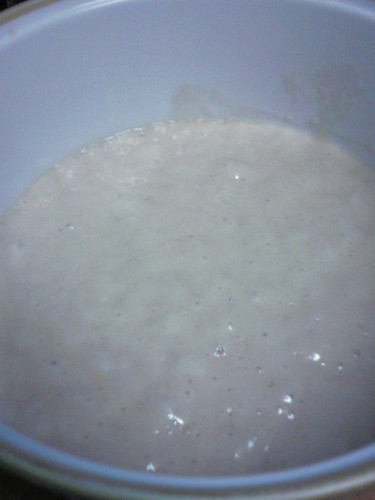
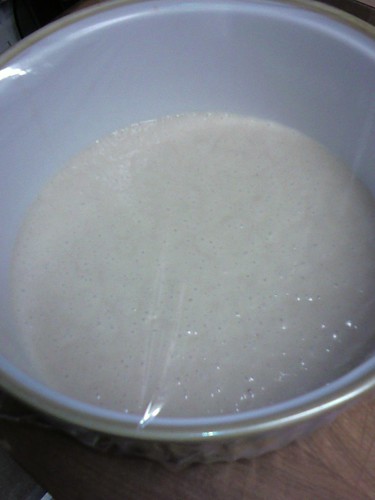
Pour in your bottle Maker’s Mark. Stir. Put on a lid or cover with plastic wrap. Sit out in room temperature for 6-8 hours.

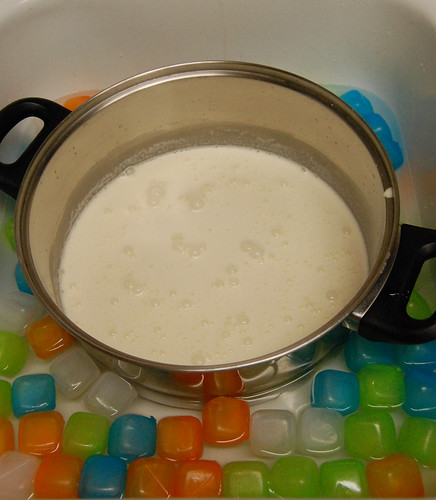
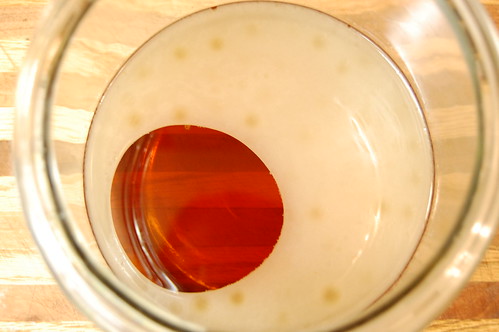
Put the jar in the freezer for 30 minutes or fridge overnight. The fat will solidify into a lid. Remove the fat.

DSC_0404

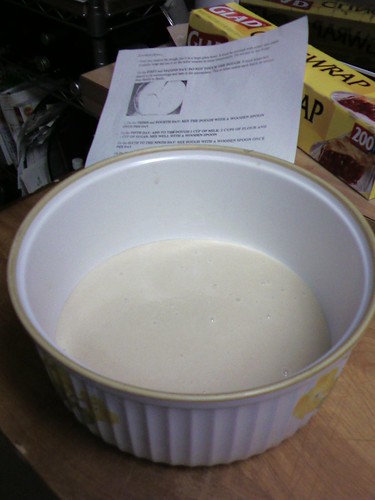
For extra measure to make sure there’s no grease or bacon particles left floating in your bourbon, pour the bacon bourbon through cheese cloth or coffee filter.

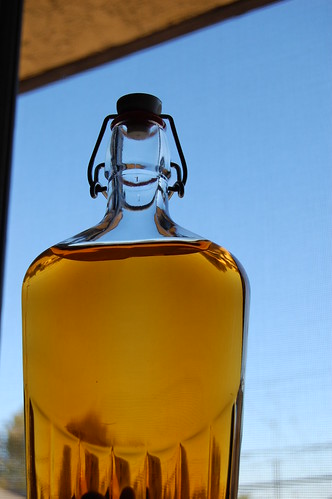
Re-bottle. Re-label. Enjoy!

DSC_0419

Oh, and just a precaution in case the bacon greasy goodness might go rancid on you, I keep my batch in the fridge.

Now, the big question is this: Did I like drinking my own creation? Unfortunately, the bacon just isn’t enough incentive for me to like the taste of whiskey.

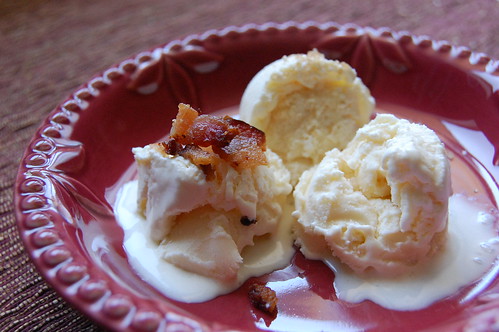
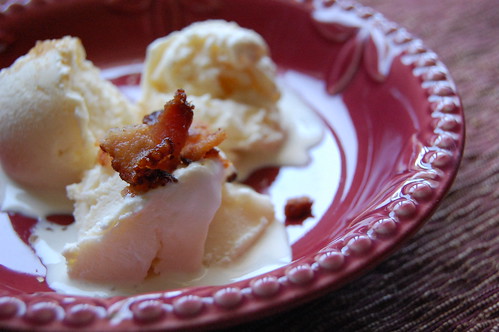
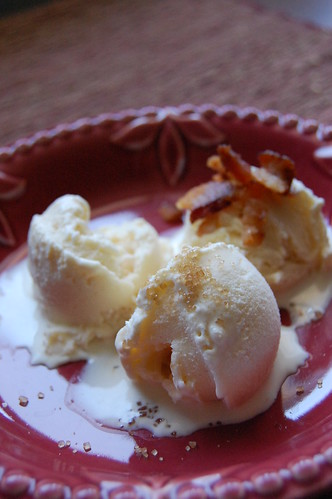
But hey, I get to eat the all the cooked bacon afterward. I’m not complaining!

August 25, 2009

Brown Butter Ice Cream with Bacon

First, I must thank Pim, "queen of food bloggers" at Chez Pim and now also author of The Foodie Handbook.

It's her Brown Butter Ice Cream recipe that brings us to this monumental moment in my food biography.

Kids, I have made the perfect ice cream to mix the bacon into.

Pim's Brown Butter Ice Cream

I made Brown Butter and Bacon Pasta back in the early days of HmmFoodGood, and have been in love with the flavor combination since. Naturally, when I read about Pim's ice cream, the first thought that came to mind was, "Hmm...I wonder if we could put bacon in it..."

Off I went, following all the steps listed in Pim's recipe down to the tee...well, except for the chilling in the fridge part.

There are TWO trickiest points in this recipe you must take heed.

First, browning the butter. Too brown and you'll have to strain off the burned chunks. Too light and you won't have the nutty buttery goodness. Once the pot started to foam up, I watched that thing like that Ice Age rat watches an acorn. I had to keep picking up the pot and swirl the foams away to check on the color since I can't see through the foams. This is when your nose comes into play. The moment the butter smells nutty, you know you're there.

I did have all the little brown bits and I kept them in. Not only they looked pretty, they tasted really frakkin' good.

Pim's Brown Butter Ice Cream Pim's Brown Butter Ice Cream

Second and lastly, the sugar. When you're done with the custard and you taste it before sticking it in the fridge to chill, you would feel like it needs a little bit more sugar.

DON'T. ADD. MORE. SUGAR. Pim has configured this out to perfection. Trust me on this one. As a matter of fact, trust HER. It doesn't taste too sweet now but when everything mellows out in the freezer, you will find that it is perfect exactly where it is.

Now, the chilling before churning. I learned the metal-bowl-in-iced-water trick from my first ice cream experience. Almost instant gratification, I like! So, after blending, I poured the custard in a metal pot partly submerged in iced water and whisked it about until the mixture is chilled.

Pim's Brown Butter Ice Cream

My one mistake was in the churning. I think I might have taken the mixture off the machine a bit too soon. Patience surely is not one of my virtues. Haha!

But deep down, my real fear is that I would keep "tasting" the mixture and there wouldn't be any left to freeze.

Instead of the creamy, scoop-able goodness I should've gotten, my ice cream is rock solid out of the freezer. However, after leaving it out, it's totally easy to scoop and as smooth and creamy as it was supposed to be.

If this somehow happens to you, I'd suggest about 10 minutes before you're ready for dessert, put the ice cream in the fridge. It'll be ready for scooping then.

Hence, a wee bit issue with photographing them. I have to let it soften enough to scoop. But then it starts to melt REALLY fast. So please, pardon the melt in these photos.

First up. THE reason why we make this ice cream in the first place: apple wood smoked bacon. Crispy fried and chopped to sprinkle-able perfection.

Pim's Brown Butter Ice Cream

The sweet. The salty. The buttery. The nuttiness. The smokiness. The cold. The warm. The custard. The crunch. The melt. The chewiness.

This has everything you'd ever want in food in texture and flavors. It was perfect. PERFECT!

Someone call Saint Peter and tell him that I am now ready for those Pearly Gates.

The bacon topping got me concern about actually adding the bacon bits into the ice cream mixture itself. If we do that, we would lose that crunch.

I must experiment with making the bacon cups for this... OOOOHHHH...

Topping #2 is for the less adventurous. Since I didn't have any Fleur de Sel to use per Pim's suggestion--and nor did my local Bristol Farms--I went with Murray River pink flake salt from Australia. Oh, and the pink flaky salt melts so fast I couldn't even catch a picture of it.

The salt cuts the sweet just right. And even if it melted off, the mildly saltiness lingered on the bite when you get to it still. It was wonderful.

And finally, topping #3 for the "normal" people: turbinado sugar. It provides the wee bit of crunch and the extra sweet kick. And it looks pretty on a plate.

Pim's Brown Butter Ice Cream

Two ice creams under my belt now. I think I'm feeling a wee little bit cocky. Hahah!

So, go ahead. Make a suggestion for my next ice cream adventure!

August 7, 2008

Julie: Fully cooked

This is Julie after I baked her. Oh, and I also added a few glugs of Meyer's rum and a splash of good vanilla.

0806082231.jpg

Julie has the consistency of a sourdough with a little sweetness. The bread feels heavy but the texture is not. She leaves a little bit of grease trail behind with that 1/2 cup of oil I had to add to her, but it wasn't gross. Overall, this is some tasty bread!

Pat O. is baking her version with cinnamon and nutmeg. I will have to report in when she gets to the office.

The experience with this "Hemin" Friendship Bread has been fun. And here is MY VERSION of the Hemin bread instruction (PDF) on what to do when you get yours, completed with the debunking of the holy bread myth and why you need to use a wooden spoon.

Can't you believe it? I was reading out there during my research and found someone talking about using the wooden spoon only with the bread because of its holy property. LOL.

Anyhoo. Have fun when you get yours!

August 6, 2008

Julie: Day 9

Tonight, I bake! You'll have the report tomorrow. But I think she's ready. The smell is incredible and the consistency is almost like a dough you could roll with your hands.

And yep, I'll post MY version of the instruction for this lovely culinary chain letter tomorrow.

0805082113.jpg

August 5, 2008

Julie: Day 8 - And other news

First of all, please welcome Chef House of She Said Pastry He said Food to our humble blog. House and I "met" online after he responded to one of my posts about my mom's passing. We got to talking and the next thing I know, he started to blog. He may be an experienced chef, but House also talks about street food and how to improve our home cooking. Hopefully we can all learn from his input.

Welcome, Chef House!

And now, Julie report. She was SUPER bubbly last night. She rose up to just about the same size the other day. Since the photo and report is one day behind, Julie's bake off day actually is tomorrow. I will report in on how she did and, yes, I will post the instruction as well.

0804082040.jpg

August 4, 2008

Julie: Day 7

Look at how big she's gotten! When I left the house this morning (Day 8 picture tonight), she was a little bit bigger than this now.

And the kitchen starts to smell a little bit like bread even when she's all covered.

0803081723.jpg

August 3, 2008

Julie: Day 6

There she grew! And she was thick enough to hold up a spoon all on her own. Neat, eh?

I also just now realized that the 10th day when I suppose to bake her, I can't do it. I'll be at a dinner that night. Hopefully, I can leave her on the counter for one more day. Or I can stay up until midnight baking her...?

Any expert suggestion on what I should do?

0802081943.jpg

August 2, 2008

Julie: Day 5

This is Julie before feeding. Big bubbles and the smell, still yeasty, but a little bit on a questionable side than a fresh bread smell the day before. But hey, that's the process.

0801082333.jpg

This is Julie after I fed her milk, flour, and sugar. A little bit more in volume and she's thicken up quite nicely.

0801082338.jpg

August 1, 2008

Julie: Day 4

Bigger bubbles at the end of Day 4.

So far, she seems happy, bubbling away. She's smelling of fresh bread right now. I wonder how this might change once I feed her flour, sugar and milk tonight.

Oh, someone has asked if I will post the instructions for the bread here. I will as soon as I retype up a new sheet so everyone can use it for their friends later on.

0731081838.jpg

July 31, 2008

Julie: Day 3

Not much going on. Still bubbly after stirring.

By the way, I've done some more research on the Hemin bread starter which is what Julie is. I updated it over on Julie Day 1. Check it out.

0730081855.jpg

July 30, 2008

Julie: Day 2

Look at all the bubbles! She's definitely alive.

0729082322.jpg

July 29, 2008

Julie Watch: Day 1

This is Julie, my friendship bread starter passed to me from a friend. Julie will be my first bread that is not banana nut!

This is julie my starter

ETA: Upon reading the instruction further, I come to find out that this is NOT the traditional Amish Friendship Bread. Instead, this is the urban-mythical Hemin Bread.

Essentially, it's the same thing as the Friendship bread but someone started to add the whole Catholic myth to it. i.e. the starter came from Padre Pio of the Vatican and therefore this bread is holy. Brilliant story for an urban myth, whoever started this one.

Oh, and the whole using ONLY the wooden spoon thing is not adding any more magical element to the dough. I don't know why exactly yet--some please shed some light on this one. But I'm sure it has to do with chemical reaction of yeast and metal, and the fact the dough would stick to the metal spoon like crazy.

April 14, 2008

Semi Homemade Garlic Fries

A while ago, I had a very strong craving for garlic fries. The best I've had to date is from La Creperie in Belmont Shore. Nobody has gotten to that fantastically crispy and perfectly garlicky level. Red Robin tries, but somehow I don't like the steak fries garlicky. But I digress.

The closest thing I could do is to bake up some frozen skinny fries and toss them with garlic butter. But some days, it's just too hot or I was just too hungry to wait for all of that.

The solution: fast food skinny fries.

The experiment: One regular side order of fries from Wienerschnitzel. Not my first choice in skinny fries, but it was close to the house. I do, however, want to experiment with In N Out fries next time.

Just put a tablespoon of butter (salted or unsalted up to how salty the fries are) and finely chopped one of the smaller clove of garlic in to a small microwaveable bowl. Nuke that for about 10-20 seconds until the butter melted and hot. (If you like it with a little heat, you can add some hot sauce or cayenne pepper into the hot butter too.)

Transfer your fries into a plate. Top with the hot garlic butter. Toss to coat.

The ratio of butter to garlic to fries is just right with this particular measurement. Not too buttery or super garlicky.

It wasn't La Creperie, but it was pretty darn good. And one dangerous discovery. Totally craveable this monstrosity is!

April 19, 2007

B3 Pasta

It's fate, I tell you.

Real Simple Magazine showed up with how to brown the butter and what to do with it. Given the track records, recipes from RS seems to fall on the bland side. But I was willing to give the brown butter recipes a try.

Especially when it says BACON and BUTTER in its title.

Original recipe is Tortellini with Bacon, Greens and Brown Butter. The greens refer to arugula or baby spinach, watercress or basil as substitution. Nope. No greens here. But I did find my last surviving bit of fresh sage. Nor did I have any tortellini laying about. Bacon, butter and spaghetti, on the contrary, are MY staples.

And voila, a somewhat original recipe! And it was as fast as you can cook your pasta/bacon too!

Brown Butter and Bacon Pasta

1 pound spaghetti
6 ounces sliced bacon
6 tablespoons unsalted butter
1/2 TBS fresh thyme leaves, roughly chopped.
Salt & Pepper
Red chili pepper flakes (optional)
Parmesan cheese (canned or freshly grated, either way)

1. Cook the pasta according to the package directions.

2. Meanwhile, cook the bacon in a large skillet over medium heat until crisp, 7 to 8 minutes. Reserve the bacon and discard the drippings.

3. Wipe out skillet and return to medium heat. Add the butter and melt, swirling or stirring with a wooden spoon as it starts to foam and sputter. Remove the butter from the heat as soon as it begins to turn golden brown and smells nutty, about 1 minute.

4. Break the bacon into small pieces and add to skillet with the sage, salt, pepper,
pepper flakes, and cooked pasta. Add some parmesan cheese. Toss well and divide among individual bowls. Serve hot with more cheese!

April 17, 2007

The Vinegar Experiment Part 2

This weekend I bottled most of the vinegar in the crock. We strained out the mother then filtered the stuff in bottles, leaving them in the brew closet to age a bit. Right now the vinegar it really fragrant and sharp. I was a bit worried, but I think it tastes better than the supermarket stuff. I have to say the mother was the most disgusting thing I've ever seen in my life...a cross between jello and slime. Most of the mother went in the trash but I did save some. If anyone is interested in using their leftover red wine in this fashion let me know and the next time I bottle up (about 6-10 weeks from now) I'll save you some mother and send it your way!

March 28, 2007

The vinegar experiment...part 1

A few months ago, I got it in my head that a great way to use leftover wine or wines Jon and I didn't really like was to make vinegar out of them. So I got Jon to get me a vinegar "mother" from his brew supply store, I bought a crock, and I began to add wine. Tried it a while ago and figured out that constantly feeding "mother" wasn't the best of plans as the vinegar wasn't fully maturing. I've left it for about a month now. The instructions say a month or two should do it. So, I'm crossing my fingers that my three gallons of vinegar will turn out OK. Anyone have suggestions for additions to bottles of red wine vinegar? Garlic is a no-go as unless you add enough citric acid it could grow botulism. I have no intention of poisoning anyone. :)

February 17, 2007

Fry Me A Chicken, Part II

Never give up! Never surrender! Especially when you have willing volunteers lined up to be your lab rats. :)

I had another bout with frying up chicken tonight. Same recipe from before but this time I tried 3 new strategies.
  1. Only drumsticks and thighs, going in at a combination of 2 legs and a thigh or 2 thighs and a leg. Smaller pieces may be the key!
  2. Cast iron skillet. After all, my first few attempts were done in the great ironside.
  3. Frying partially "blind".
First, I filled the cast iron skillet just about half way with peanut oil and set the thermometer in. It hit 355-360 F per instruction. And frying commenced.

The first batch went in for 6 minutes on each side. The result was the same as using the big pot at the same temperature: dark crust, uncooked meat close to the bone. The herbs also burned in the progress. Last time at least I could still eat the garlic!

After filleting the chicken pieces open and sticking them in the microwave, I turned the heat down a tad. Now the temperature hovers around 325-350F and the second batch at 7 minutes each side came up not as dark, but the meat was still undercooked. That one when in for 2 minutes in the microwave. The first batch only went in for a minute.

At this point, the thermometer came off. Screw it with accuracy! Let's go with the gut!

I turned the heat down a little further and the third batch had beautiful golden color. Still not completely cooked through, but getting better. And the final batch turned out almost perfect except for a bit of pink in the thighs. I nuked the last batches for a minute each.

I kept the entire finished product in 140F oven to keep warm. We waited for about 15 minutes before Shane and Serena, a.k.a. lab rats, showed up for dinner.

I asked that all of us eat with forks and knives. Pretty much, "if you see anything pink, I'll stick it back in the microwave" kind of dining.

Surprisingly, every single piece was perfectly done. I think it's partly the microwave and partly sitting in the warm oven that allowed them to cook a little more.

The microwaved aftermath did produced a LOT of juices as the pieces got cooked. I was afraid those pieces would now be bone dry. But yet, the final product was STILL incredibly juicy.

I'm getting close to perfection, you guys! Part III should be good. :)

January 27, 2007

Fry me a chicken

Last night marked my 3rd attempt to make fried chicken.

The good news, I have found THE BEST recipe for the juiciest chicken and perfectly seasoned batter.

The bad news, even with the frying thermometer and following the recipe every single little step PLUS I even took the chicken out of the fridge to take the chill off longer, I still ended up with too brown crust and too undercooked meat.

Yep. For the third time, my fried chicken pieces are somewhere between "golden brown" and "burnt beyond recognition" but the meat inside, close the bones, is still undercooked. I have to fillet a few thick pieces and nuke in the microwave for a few minutes to get the thicker pieces right. And the first two times, I didn't even have the thermormeter. I was frying them up old school, Crisco in an iron skillet.

I can't really rule this as total disaster as both me and Brandon totally fell in love with the recipe.

If you have better luck than me with frying, help yourself to Tyler Florence's Ultimate Fried Chicken. It is seriously good.

In this set, he also makes Cherry Tomatoes with Buttermilk Blue Cheese Dressing and Roasted Corn with Chili Lime Butter.